
Oh my goodness, this past month was a total whirlwind, and my backlog of projects to photograph is bigger and better than ever before, just take my word on that. Travel from city to city and hosting friends in Mumbai was layered with furious working and sewing sessions, none of which has been conducive to blogging, but it has been a blast, I must say.
Projects I’ve completed include, but are not limited to, two pairs of Carolyn Pajamas from Closet Case Files, a bunch of Burda Style Jakob shirts for Mr. Struggle, curtains for our apartment, a bajillion Scout and Tiny Pocket tees, a Mission Maxi Dress, by Christina Hayes, a self-drafted box pleated maxi skirt, two more sleeveless Archer shirts, a Seamwork Adeline dress, at least three plantain tops, a McCalls M6696 shirt dress that I finished last night, oh god, the list goes on and on….
How do you guys do it? How do you get good consistent photos of your projects? This is something that has plagued me since I started blogging, how to get photos, how to make time for that, how to even like the way I LOOK in pictures, how to not feel embarrassed to ask other people. I left my tripod at home in the States, and I will say having one did make it a little easier to get photos of myself, but it’s always been an issue for me, getting photos of my projects. I love my friends, but I don’t always love their photos, and I get uncomfortable trying to get them to do what I want them to and usually give up halfway through and say, it’s fine, it’s fine, and never use the photos because they aren’t what I want. I think the trick is to take a million photos, because then about five of them work, but no matter how many times I assure people “just keep taking photos” or “tell me if I look weird” it is rare that either of those things actually happens. But given the kind of backlog I have, I think I need to find some kind of better solution here, because I have so much unblogged…I have the sewing part down, I like the writing part too, but the photography part, that’s the issue.
At any rate, here is a quick outfit and a lot of photos from my travels to the north. India is a great place for fabric, as you may know, but what you might not know, what I didn’t really know, was the amount of types of fabric that are produced all over the country, and the fact that every region has their specialities, their methods, their materials, their weaving and dying techniques. The floaty fine muslins that inspired such fervor in Regency England come from Bengal, things like this:


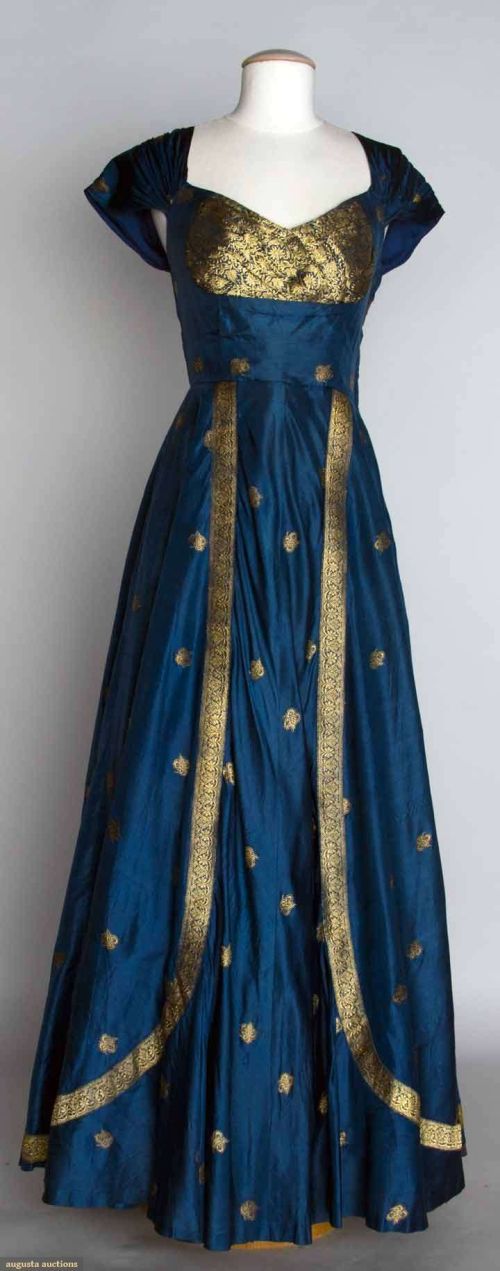
The thick brocade silk weaves of Benares, now Varanasi, are duplicated all over the world, and they look like this:

Chintz from the Coromandel Coast inflamed the European imagination, and we can see the influence of these patterns and dye techniques even today:

But for many, when they think of Indian fabric, the first thing that pops into their head is hand block printed styles from the great state of Rajasthan, or Land of Kings. A central fabric producing hub since pre-Mughalite India, it wars with nearby Gujarat, the embroidery center and longstanding fabric powerhouse, for dominance of Northern styles, and it’s the place I wanted to take my friend Liz, (hi, Liz!) who was visiting me in India. A magnificent pattern maker and stitcher, although she loathes both (why oh why does the universe give such gifts to those who spur them?) Liz is a costume historian and she works at FIT. Despite her disinterest in sewing she does actually sew, and makes awesome beautifully constructed things I would kill to create, and she was excited to do some textile-based tourism in India. We toured the Anokhi Block Printing Museum (which I had detailed in this post), and even got to visit the amazing Rangotri Fabric Printing Workshop (a must for any Jaipur visitors interested in this form). We also did some damage at Delhi’s government emporiums, which are a fabric education in and of themselves, showing visitors the variety and magnificent quality of Indian textiles.
Check out our bounty:
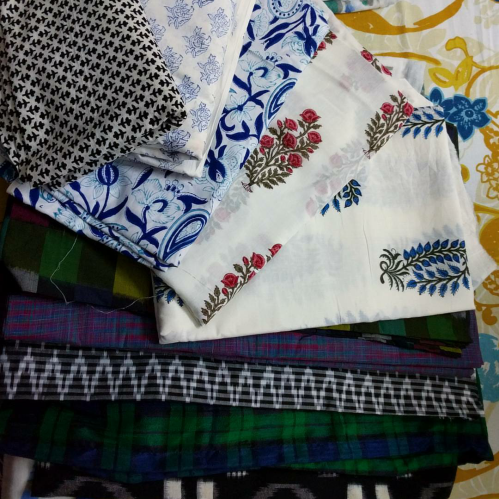
Block pints and ikats!

Khadi forever. There is so much beauty in this simple cloth, I can’t get over it!
I know, I know, it’s excessive, but to be fair, half of this stuff is Liz’s….
Now, to show you the guts of the Rangotri Fabric Printing Workshop!
Headed by Vikram Joshi, who worked for Anokhi for a long time before heading out on his own, this company is amazing and does gorgeous work. Using traditional techniques and modern aesthetics, Joshi often enlarges a simple shape or design until it becomes something else entirely as a block, or uses older designs with different colors and combinations, to create something that is at once traditional and new. He does custom printing work as well for people, carving blocks and printing designs that look so unlike what you think of as wood block printing, it’s remarkable. With a workshop that includes all levels of production, from block carving to clothing stitching all in one place, the quality control and design is all supervised by Joshi, who was kind enough to give us a tour and set me loose in his overstock room, where I picked up more than one amazing piece of fabric….

The floral on the left and the zebras and the blue bird are all from Rangotri.

Cadfael modeling his personal favorite. Some of this has already been turned into a living room curtain but the rest is going to be an outfit so I can match my curtains a la Maria Von Trapp!
He also collects wooden blocks, and has an insane collection of textiles and pieces in his own personal little museum. I hope someday he makes a larger museum, because I would so be there….
Check it out!

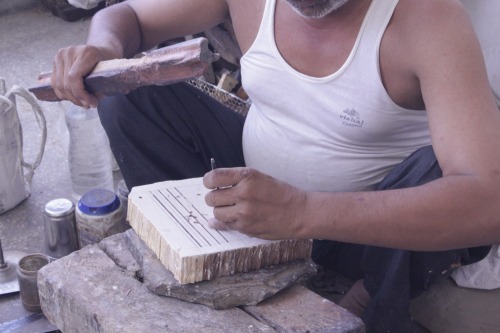
A block printer carving out a simple design or horizontal lines.
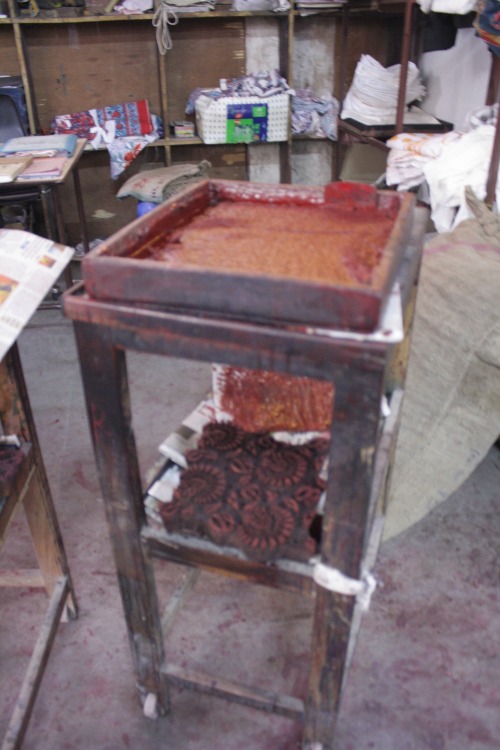
A block and the dye.

The block printing wardrobe. Watching these amazing printers quickly and perfectly place the blocks and print the fabric is insane, both hypnotic and awe-inspiring.

A little close up for you. Most prints require a minimum of four blocks. Every time you see a color, that’s a block to distribute that color.

Prepping a piece for printing.


Once it’s printed, it’s hung, then later washed and dried.

The “true” final color of the print above.

Amazing that this is a block print, right? It looks painted, but it’s all coming from a carved piece of wood. Also, you can see what happens to the color after it’s processed, washed and hung. The colors on the bottom are the “true” final colors.

This guy soaks and beats the cloth. Clearly he doesn’t need a gym membership. I can’t believe no pop-gym has adopted this as a work-out method yet….


Quality control! Having the whole process in one place means immediate communication about the quality of the objects.
Rangotri produces a lot of home-goods fabrics, in fact, that’s most of what they do, which is sad, because I would buy ALL the fabric from them if it was commercially available. As it is, you have to go there and hope they left you pick up a piece or two. Still, it’s totally worth it!
And now, just because I have to get through this one way or another, a little outfit post for you:
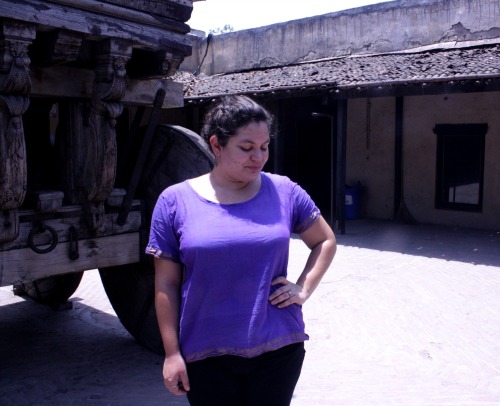
It’s a Scout Tee from Grainline Studios in a fabric I picked up in Kolkata and a pair of Butterick 5898 Patterns by Gertie pants in a stretchy crappy fabric I grabbed at Mumbai’s Mangaldas Market, which were great for Delhi in summer (it’s already summer here), because it helps to be more covered up in Delhi, a city where men actively stare at you wherever you go, although it’s so painful to be so in the scorching unforgiving sauna that is Delhi. Capris and loose-fitting tops like this help. They don’t ENTIRELY make it great, but they help!

Oh! I also did Me Made May, of course, through my Instagram but honestly, at this point in my life, I wear me-made every day, so I sort of have a me-made LIFE, really. I always enjoy seeing other people’s stuff, though!
Okay, I’m off to put my life back together post-travel, and try to figure out a way to photograph my excruciating backlog, sigh. Seriously, advice is welcome! Happy June, everyone. What are you sewing this summer?


